그동안 실습을 위한 세팅과정을 포스팅했다면
이번 포스팅은 드디어 가벼운 회원가입 실습 코드를 작성하고 JSON 데이터를 던져 api 테스트해보는 코드를 작성할 것이다!
- NodeJS를 사용하기 위한 기본세팅: https://kth990303.tistory.com/73 (기본) , https://kth990303.tistory.com/21 (상세)
- 몽고디비 설치 및 클러스터 연동: https://kth990303.tistory.com/74 , https://kth990303.tistory.com/75
- Git, Github과 VSCODE 연동: https://kth990303.tistory.com/77
모든 코드는 아래 github에서 확인 가능합니다.
https://github.com/kth990303/boiler-plate-prac
kth990303/boiler-plate-prac
Practice Boiler-Plate use NodeJS, React. Contribute to kth990303/boiler-plate-prac development by creating an account on GitHub.
github.com
회원가입을 위한 회원도메인 작성
도메인 패키지를 생성해주고 (models 폴더) User.js로 회원 도메인을 생성해준다.

const mongoose=require('mongoose');
//User 도메인 테이블을 생성하기 위한 스키마
const userSchema=mongoose.Schema({
    name:{
        type: String,
        maxlength: 50,
    },
    email:{
        type: String,
        // space bar를 없애준다.
        trim: true,
        // 중복을 허용하지 않는다.
        unique: 1
    },
    password: {
        type: String,
        minlength: 5,
    },
    lastname:{
        type:String,
        maxlength:50,
    },
    role:{
        type:Number,
        // 기본값
        default: 0,
    },
    image: String,
    token:{
        type:String,
    },
    tokenExp:{
        type: Number,
    }
});
// User를 model화 해준다.
const User=mongoose.model('User', userSchema);

// 다른 파일에서도 이 모델을 쓸 수 있도록
module.exports={ User }
Index.js에 post api 생성해주기
아래와 같이 localhost:3000/register 링크로 들어갈경우 db에 회원 정보를 주입할 수 있도록 코드를 짜주자.
강의에서는 body-parser를 따로 import 해주었지만, express 4.16.0 버전 이후부터 express에 bodyparser가 이미 내장돼있기 때문에 아래와 같이 세팅코드를 짜면 된다.
const { User }=require("./models/User");

app.use(express.urlencoded({
    extended:true
}));
app.use(express.json());
app.post('/register', (req, res)=>{
    // 회원가입할 때 필요한 정보들을
    // client에서 가져오면
    // 그것들을 db에 넣어준다.
    const user=new User(req.body);
    user.save((err, doc)=>{
        if(err) return res.json({
            success: false, err
        });
        return res.status(200).json({
            success: true
        });
    });
});
회원가입은 post method로 작성하였고,
err가 발생할 경우 success: false가 되도록, 그 외의 경우 200을 보내주도록 하였다.
Postman으로 api test 해보기
postman을 설치하고 아래 그림과 같이 My Workspace에서 테스트할 api를 입력해준다.

우리는 register api가 제대로 돌아가는지 테스트하기 위해 위와 같이 입력해주었고,
Body를 클릭하여 JSON데이터를 입력해주었다. (default가 text일텐데 json으로 바꿔줘야한다.)
위 데이터는 일단 이름, 이메일, 패스워드 정도만 있는 데이터로 작성하였다.
이후 npm run start를 해주고 위 데이터를 send해주면 결과는 아래와 같다.
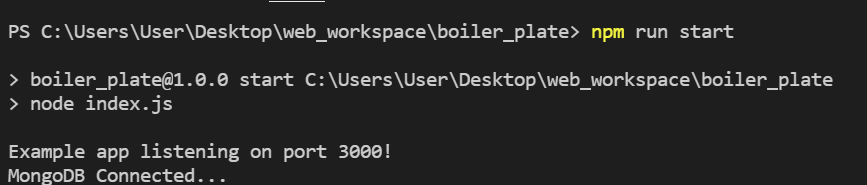

api가 에러 없이 성공적으로 200 OK를 띄우며 success 또한 true임을 확인할 수 있다.
'JS > Node.js' 카테고리의 다른 글
| [NodeJS] MongoDB를 이용한 로그인 구현 및 토큰 생성 (0) | 2021.06.21 |
|---|---|
| [NodeJS] BCrypt로 비밀번호 암호화하기 (0) | 2021.06.20 |
| [MongoDB] 몽고디비 계정 설정과 Mongoose 설치 (0) | 2021.06.14 |
| [MongoDB] 몽고디비 회원가입 및 클러스터 생성하기까지 (0) | 2021.06.11 |
| [Node.js] 오랜만에 노드 서버 실행을 해보았다 (0) | 2021.06.10 |